
Time-Lapse Video
Introduction
This guide shows how to record Time-Lapse Video within Cinema P3 Pro Camera.
Time-Lapse video captures frames at slower time intervals than standard video, which causes motion to appear speeded up when played back.
Time-Lapse Button
Enable the 'Time-Lapse Button' in the 'Display Settings' Menu.
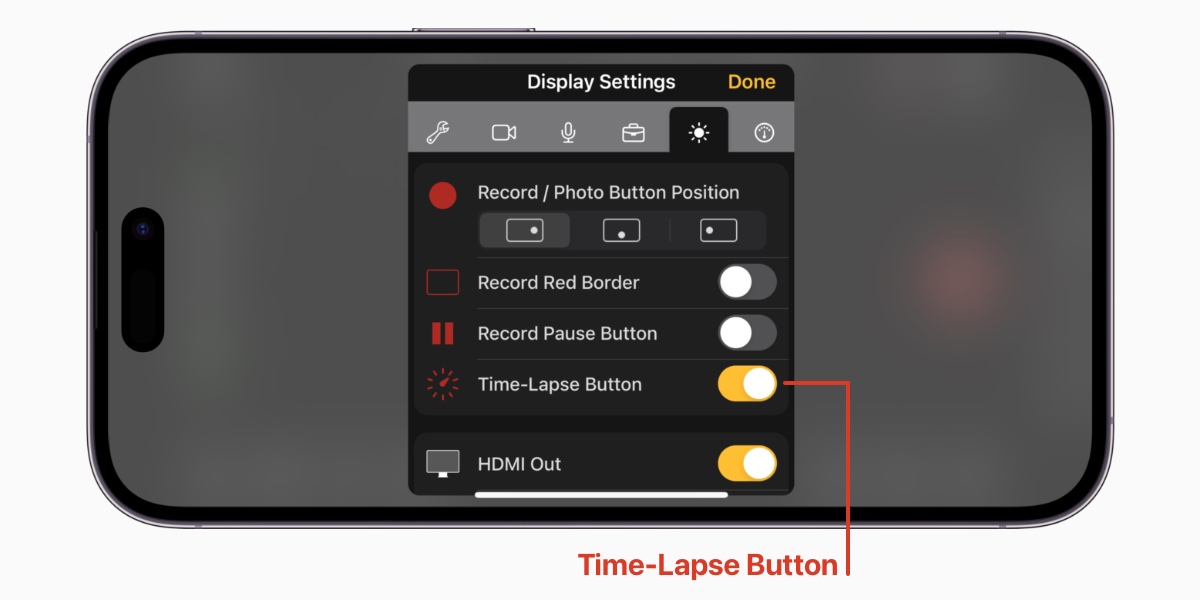
This will display the Time-Lapse Button in the top right corner of the screen.
The Time-Lapse Button is used to enable and configure time-lapse settings.
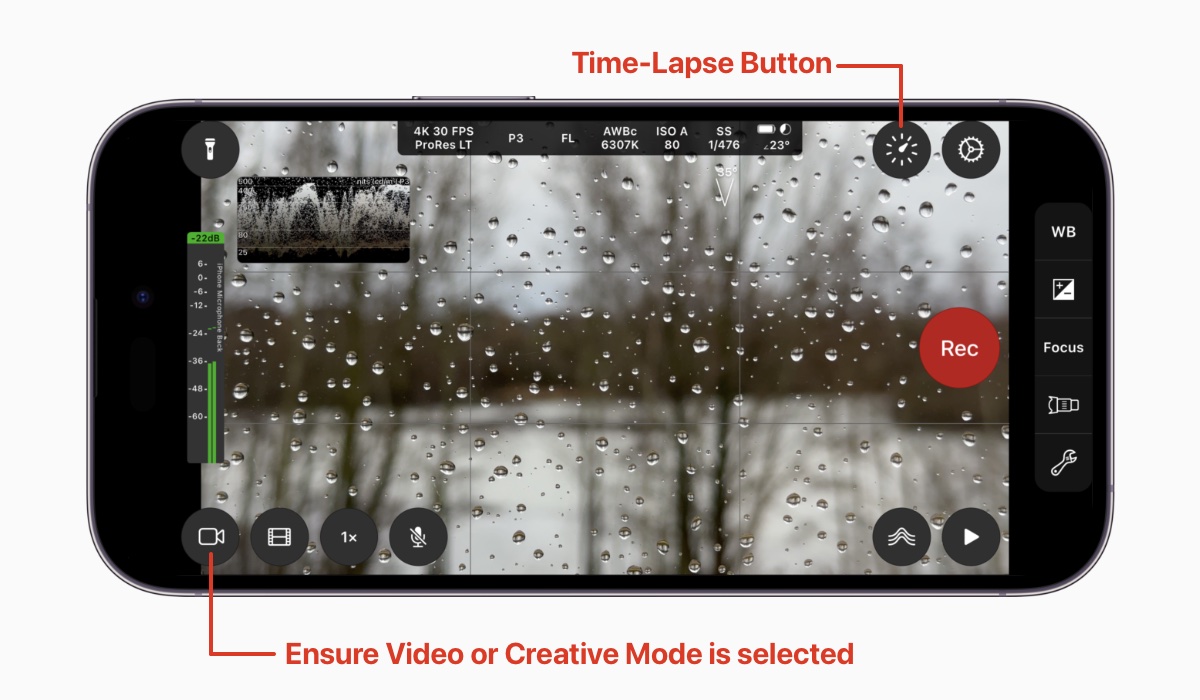
Time-Lapse is available in Video and Creative modes.
Ensure that one of these modes is selected.
(Time-Lapse is not available in Photo mode.)
Time-Lapse Settings
Tap the Time-Lapse Button to display the Time-Lapse Settings menu.
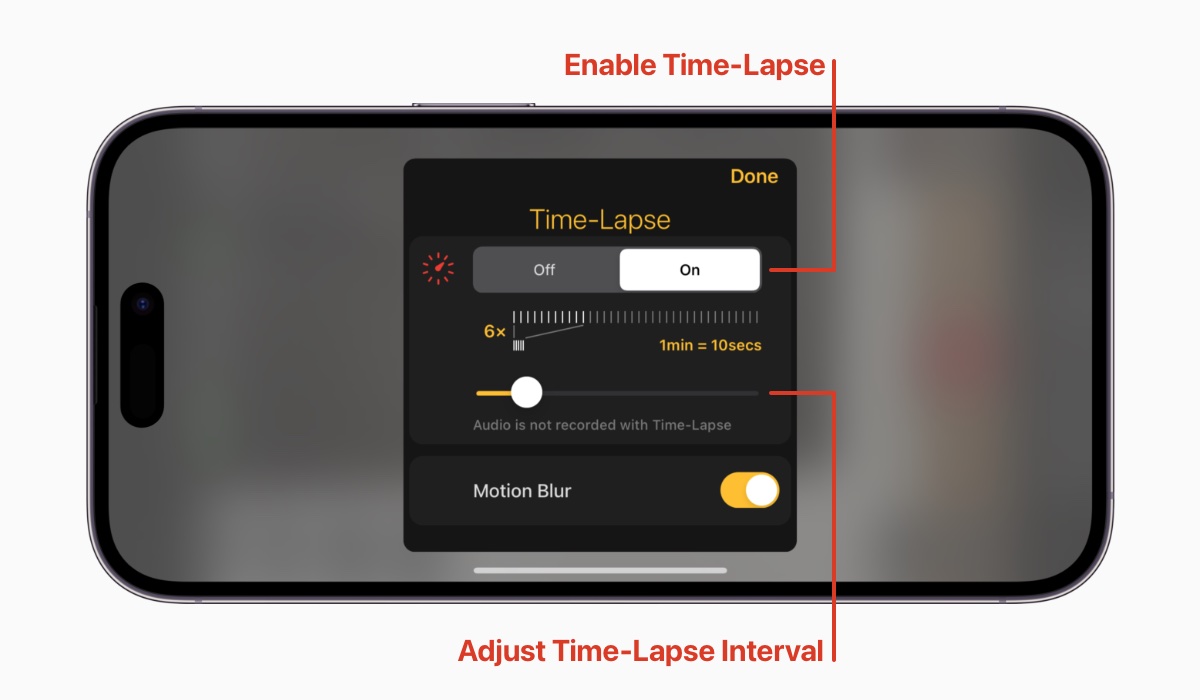
The Time-Lapse Settings menu is used to enable/disable Time-Lapse capture and configure Time-Lapse Settings.
1) Select On to enable Time-Lapse Recording.
(Select Off to disable Time-Lapse Recording.)
2) Adjust the Time-Lapse Interval Slider to set the interval between recorded frames.
The scale will update to indicate how long a typical Time-Lapse Recording will take to record.
The Time-Lapse Settings example show above has a scale factor of 6x.
This means a video that takes 60 seconds to record, will take 10 seconds to play back.
3) Select Motion Blur to blend all frames captured during a recording for smoother playback.
(Note that the Motion Blur option is not available on some devices due to hardware peformance limitations.)
Recording a Time-Lapse Video
The appearance of the Time-Lapse button and Rec button are updated to indicate that Time-Lapse recording is enabled.
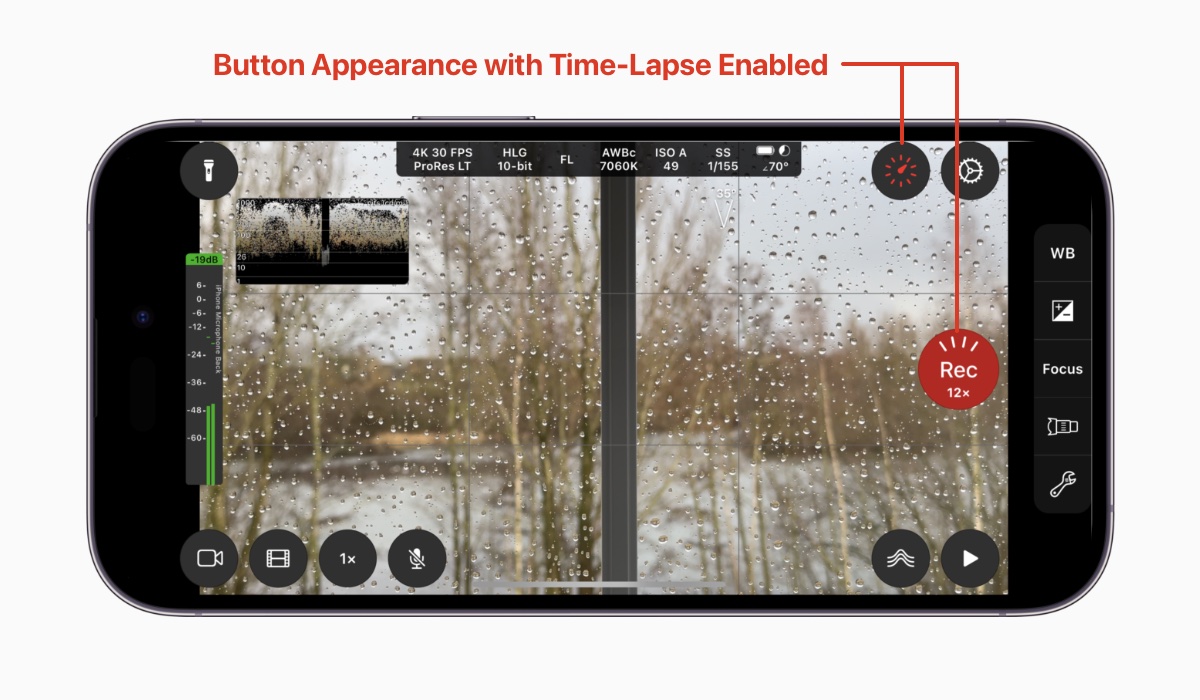
Tap Rec to start a Time-Lapse Recording.
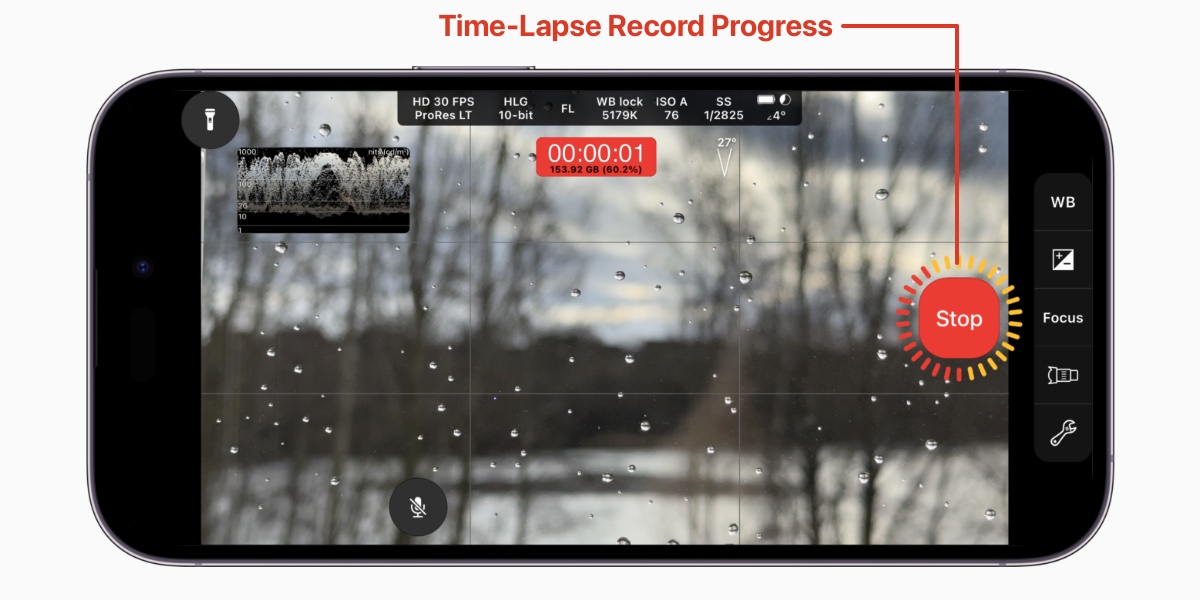
While recording a Time-Lapse Video, a progress indicator is displayed surrounding the Stop button.
This updates every time a new frame is saved.
The resolution, color space and frame rate for the Time-Lapse Video are set using the same controls for standard video recording.