Technical Guide
Log Video Color Grading Guide
Introduction
This guide provides guidance and recommendations for color grading C-Log and D-Log video captured using Cinema P3 Pro Camera.
The examples provided use the DaVinci Resolve Software, and some familiarity with this software is assumed. However, the techniques using LUTs are easily transferrable to other video editing software.
The guide contains the following parts:
- Log video in Cinema P3 Pro Camera
- Example 1 - SDR Color Grading
- Example 2 - HDR Color Grading
- Example 3 - DaVinci Wide Color Grading
Log video in Cinema P3 Pro Camera
Log video in Cinema P3 Pro Camera
Cinema P3 Pro Camera provides the option to record 10-bit video in BT.2020 color space using C-Log or D-Log presets.
These both retain the dynamic range and color space as captured by the camera and can be converted to SDR or HDR using LUTs. The LUTs can be exported from within the App.
C-Log and D-Log provide a more efficient Log transfer function for encoding compared to HLG and deliver many benefits when the video is color graded.
How to record video with Log in Cinema P3 Pro Camera?
To record in Log, you need to select the C-Log or D-Log Creative Preset.
This will encode the video with Cinema P3’s Log transfer function instead of the HLG transfer function in the BT.2020 color space.
Quick Guide:
- Select the “Creative Mode” in Cinema P3 Pro Camera.
- Select a Video Format that is identified as “Cinematic HLG 2020 (10-Bit HDR)”.
This ensures video capture will be in the 10-bit Rec.2020 color space. - Select C-Log or D-Log from the "10-bit HDR Creative Presets" Menu. This ensures the Log transfer function is used.
For higher quality video, select one of the ProRes Codecs which encode with YCbCr 4:2:2).
For more details about Creative Presets, visit the guide: Creative Presets
Pro Tip: The Creative Presets allow you to adjust color saturation in camera. This can also be used with C-Log and D-Log. The default setting (middle option) does not adjust the saturation.
For more details about C-Log and D-Log, visit the guide: Log Recording Modes
Color correction using LUTs
The LUTs are designed to convert the Log encoded video to a different color space and transfer function.
The LUT should be selected to match the output color space and transfer function of the project timeline used in your video editing software.
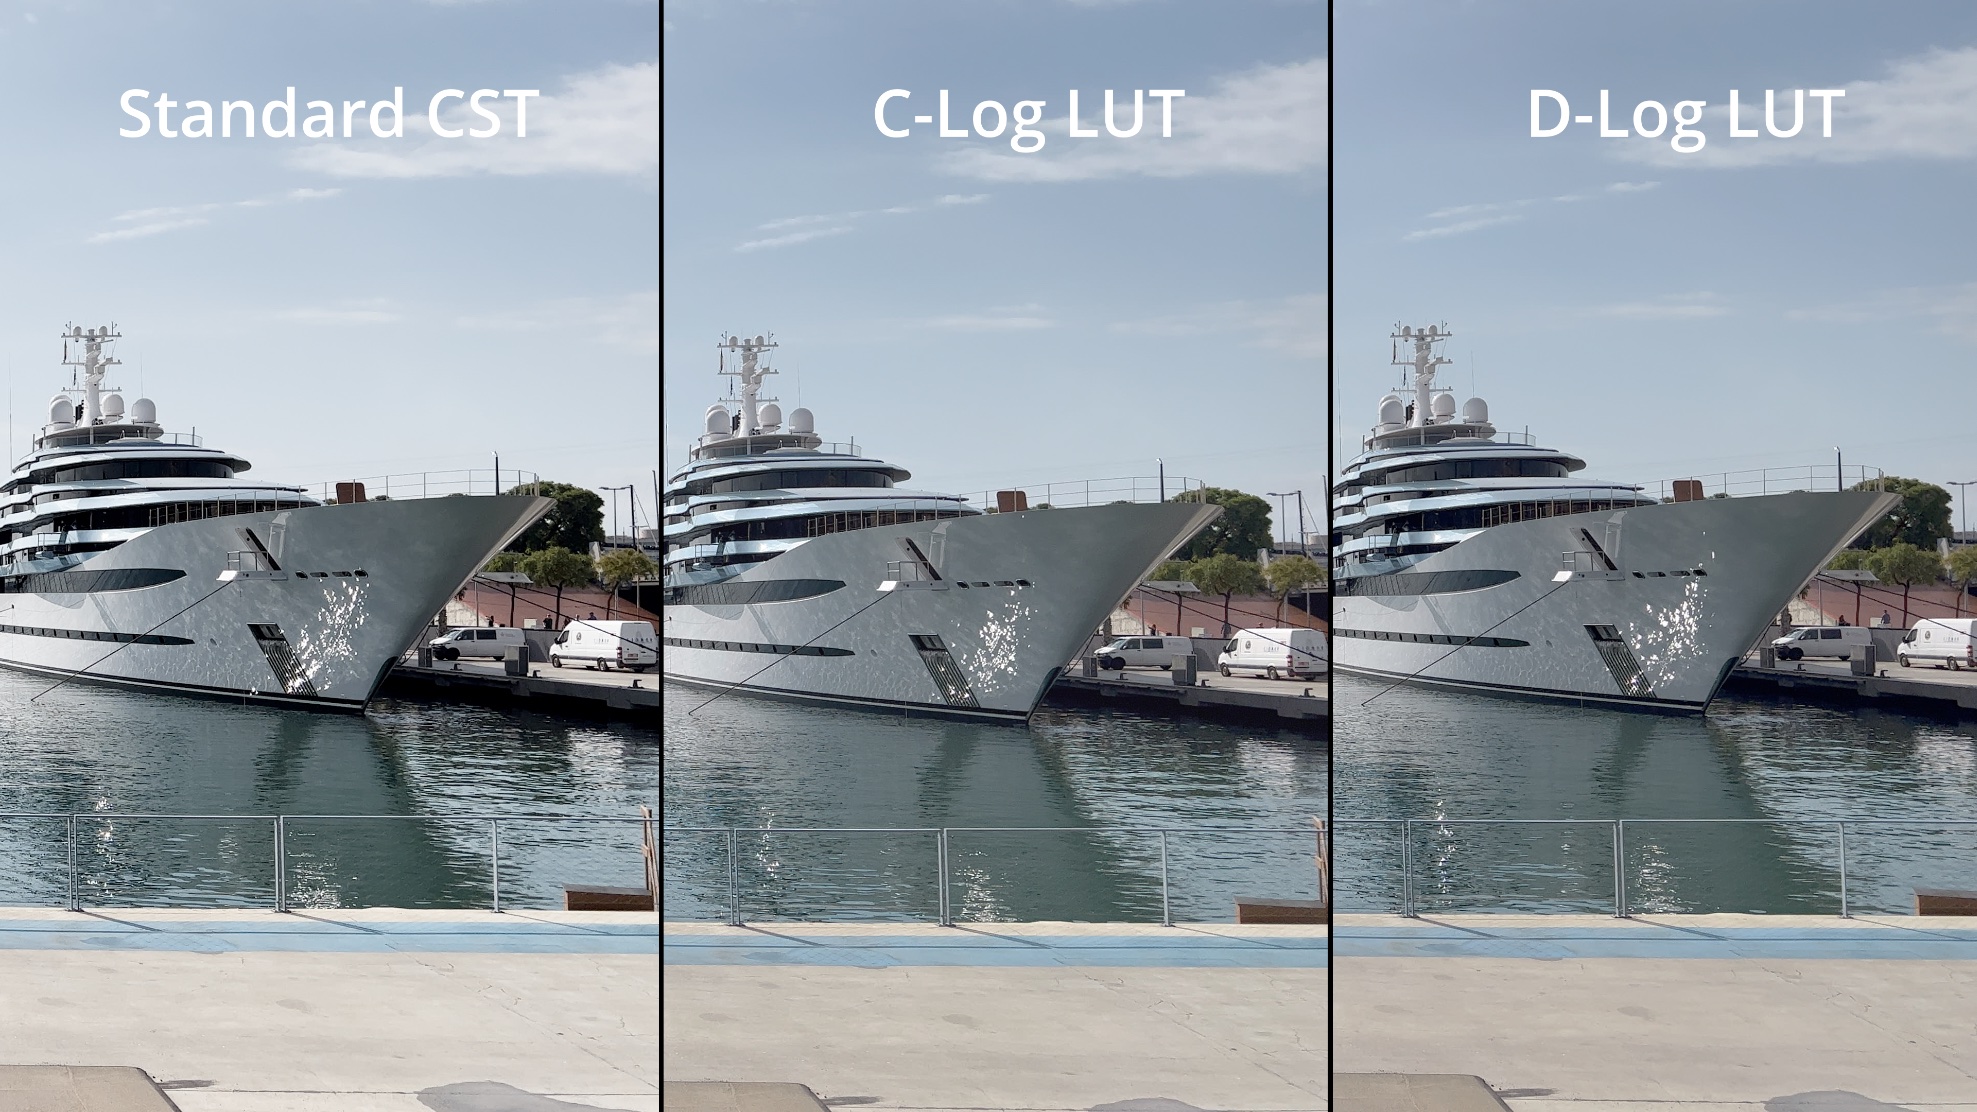
After applying the LUT, the image will be a close match the image originally output by the camera on your iPhone (i.e. without the Log preset applied).
This is illustrated in the image below which compares the Standard HLG image output (after applying Color Space Transform) with C-Log and D-Log (after a LUT has been applied).
Where to get the LUTs?
You can export a variety of LUTS from the "Settings" menu within Cinema P3 Pro Camera. Various LUTs are provided that allow you to convert the C-Log or D-Log to the following color spaces:
- BT.709 (SDR)
- Rec.2020 HLG (HDR)
- Rec.2020 PQ (HDR)
Example 1 - SDR Color Grading
1.1 Project Settings
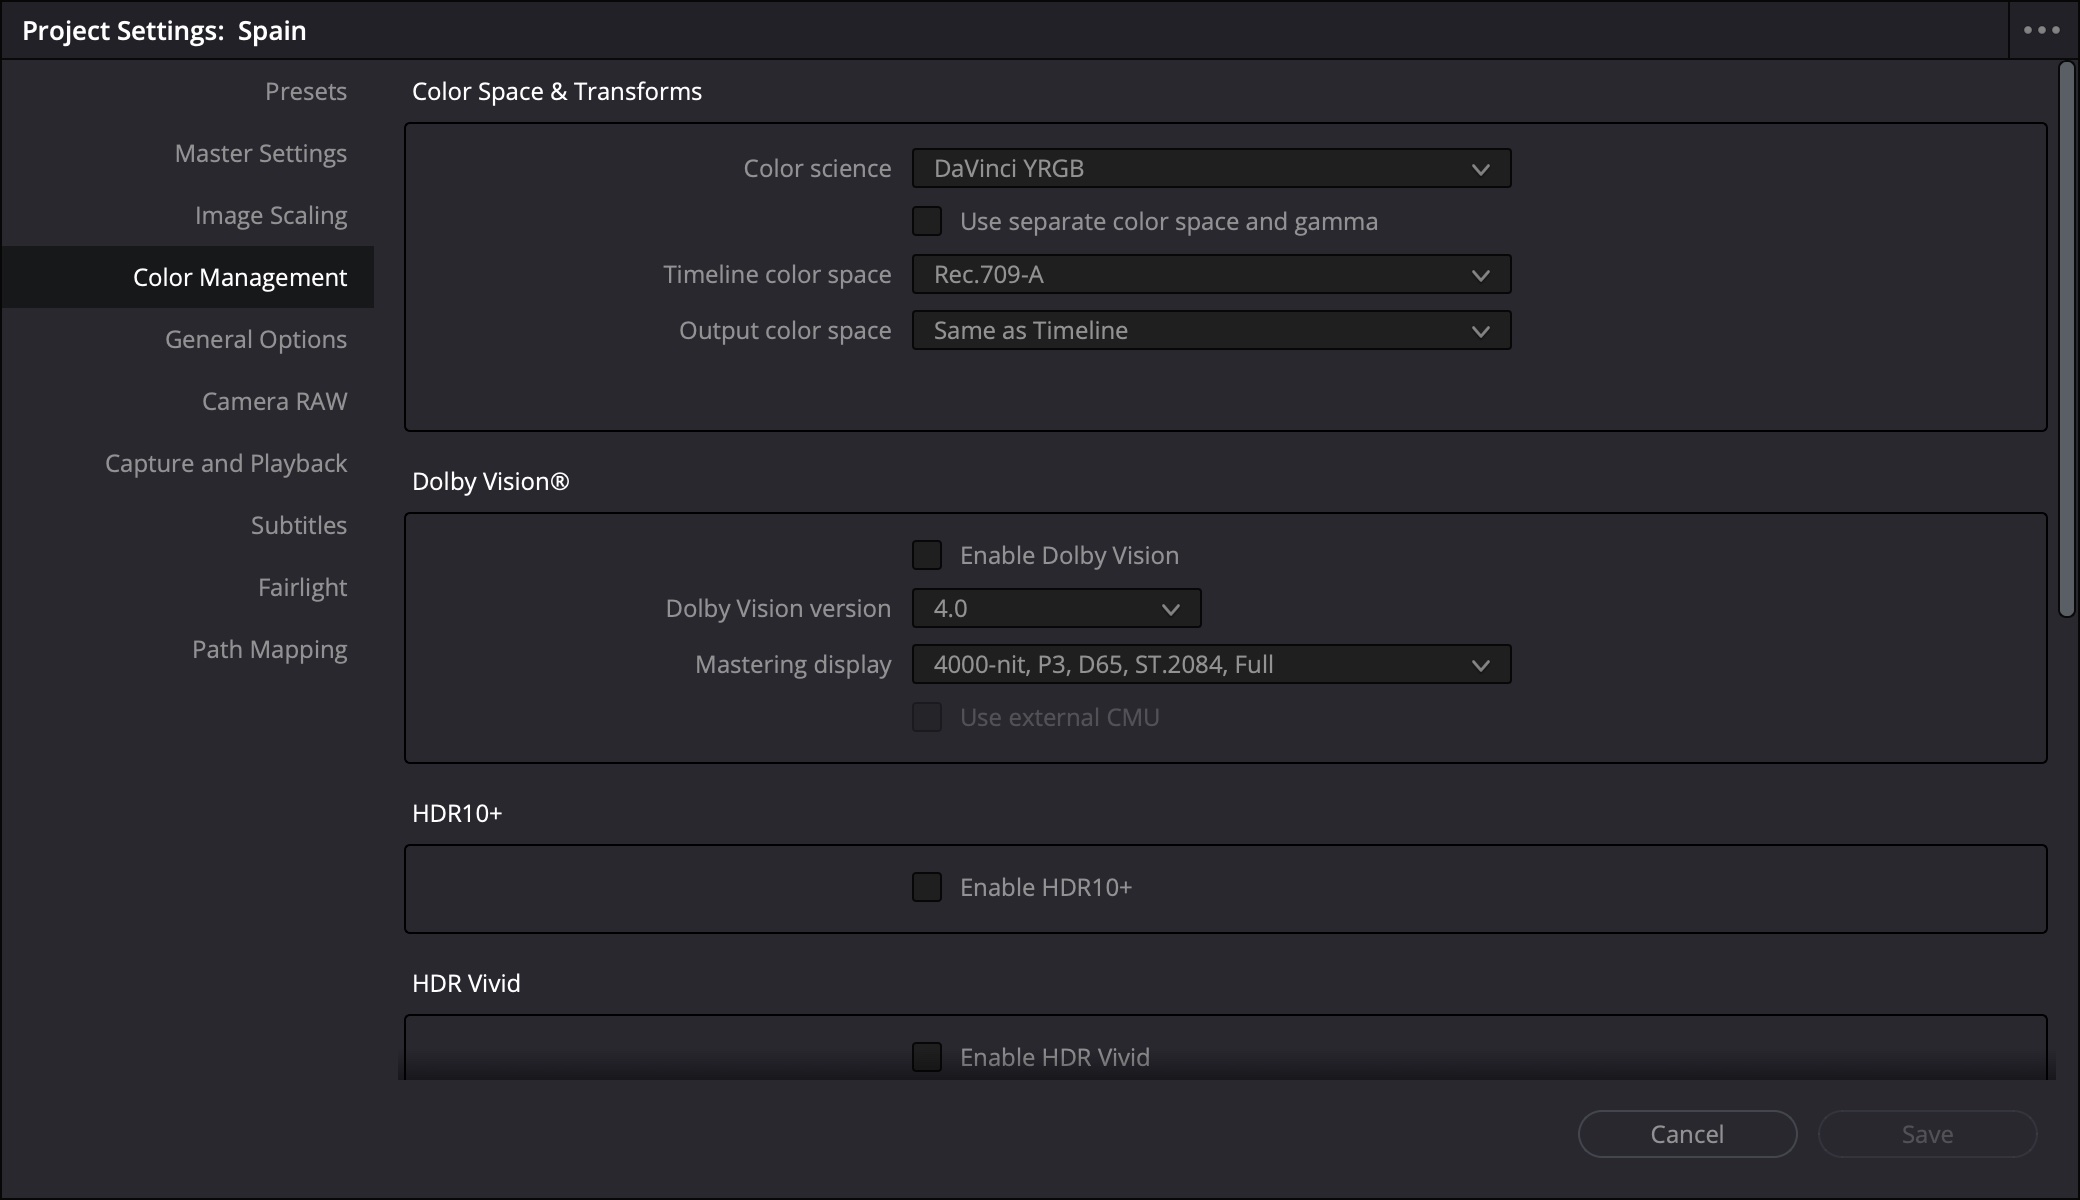
This example covers the key settings for color grading C-Log and D-Log in an SDR Project using the Rec.709 Color Space in DaVinci Resolve.
If using DaVinci Resolve on a Mac Computer, set the "Timeline color space" to "Rec.709-A" in the Project Settings as shown below.
1.2 SDR Color Grading using a LUT
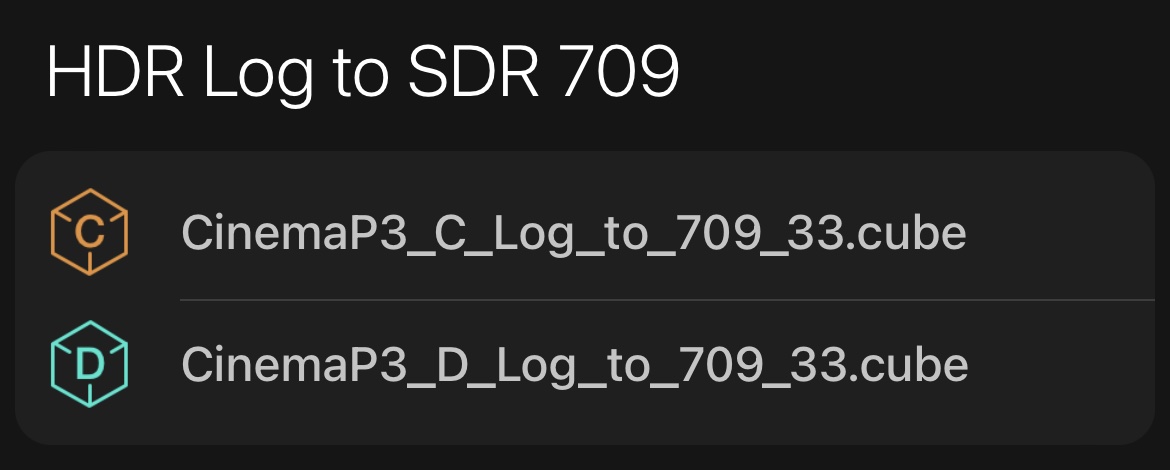
To convert C-Log and D-Log to the Rec.709 color space, the following LUTs should be exported from the Cinema P3 Pro Camera App and imported into DaVinci Resolve:
- CinemaP3_C_Log_to_709_33.cube
- CinemaP3_D_Log_to_709_33.cube
A basic node tree is shown below. The first node (D-Log to 709 LUT) uses the CinemaP3_D_Log_to_709_33.cube LUT to convert video encoded with D-Log to the Rec.709 color space.
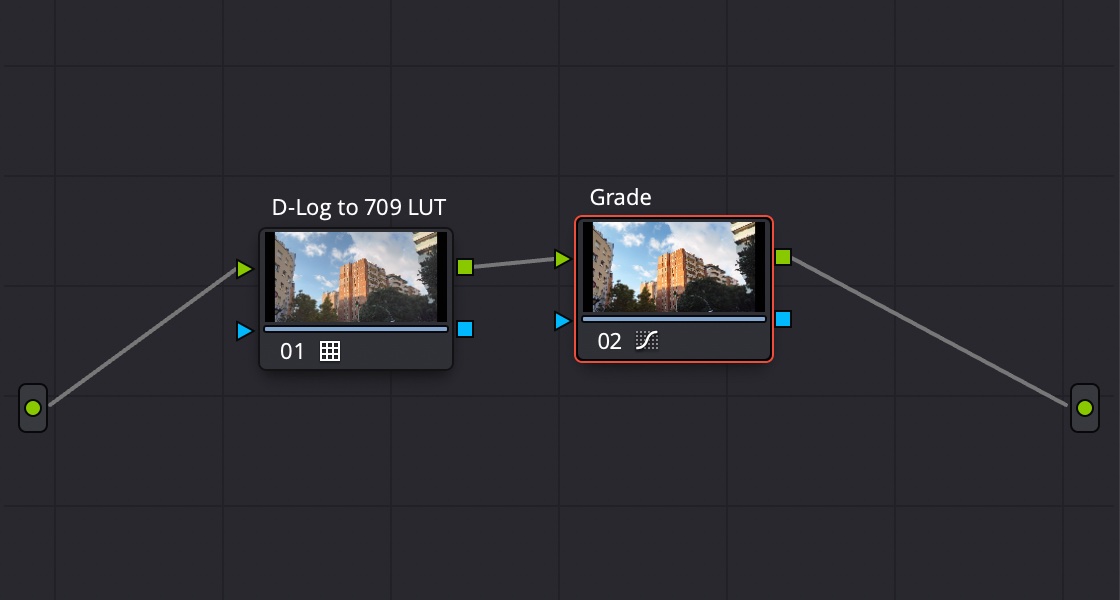
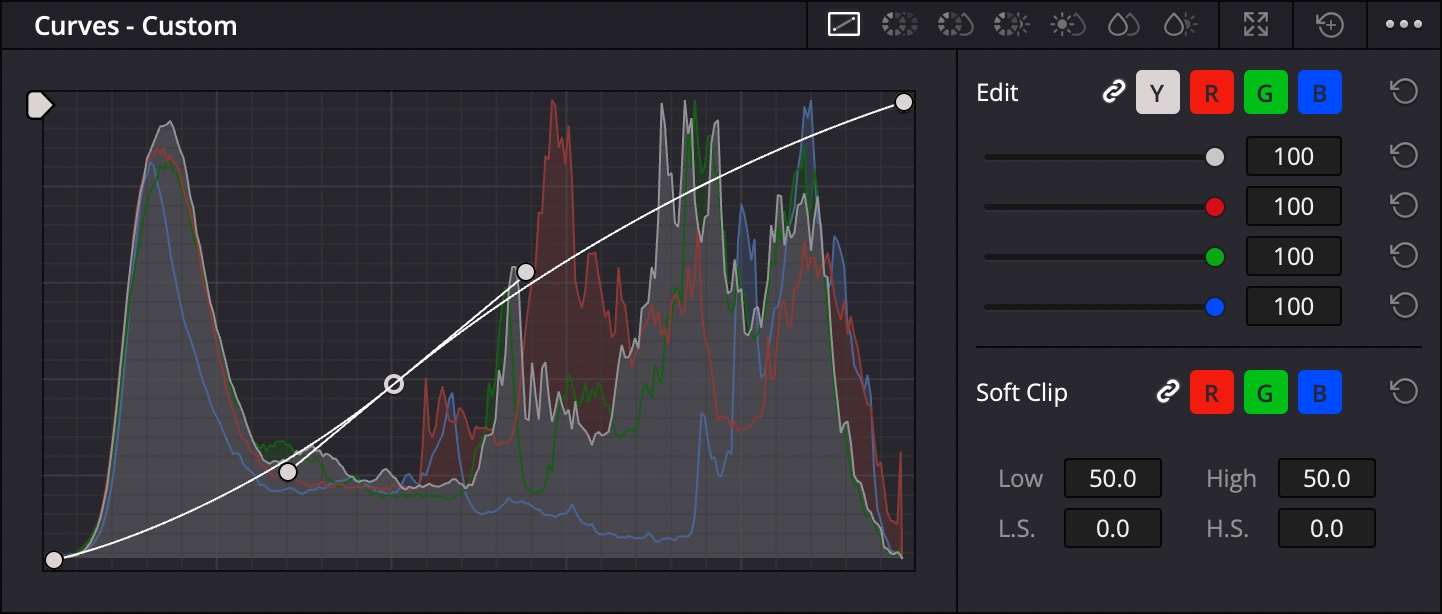
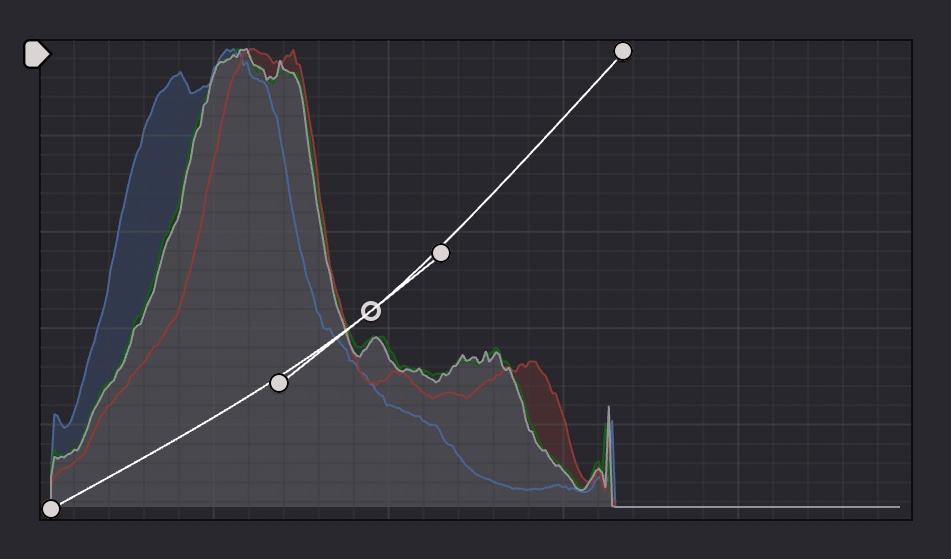
The second node (Grade) applies a color grade using an editable spline. Creating an S-Curve as shown can be used to create a cinematic look. The middle control point on the spline can be used to adjust the middle-grey point and to adjust contrast. The controls points at 0% and 100% can be used to adjust highlight and shadow roll-off.
Example 2 - HDR Color Grading
2.1 Project Settings
This example covers the key settings for color grading C-Log and D-Log in an HDR Project using the Rec.2020 PQ color space in DaVinci Resolve.
The "Timeline color space" is set to "Rec.2100 ST2084" in the Project Settings as shown below. This is Rec.2020 color space with PQ transfer function.
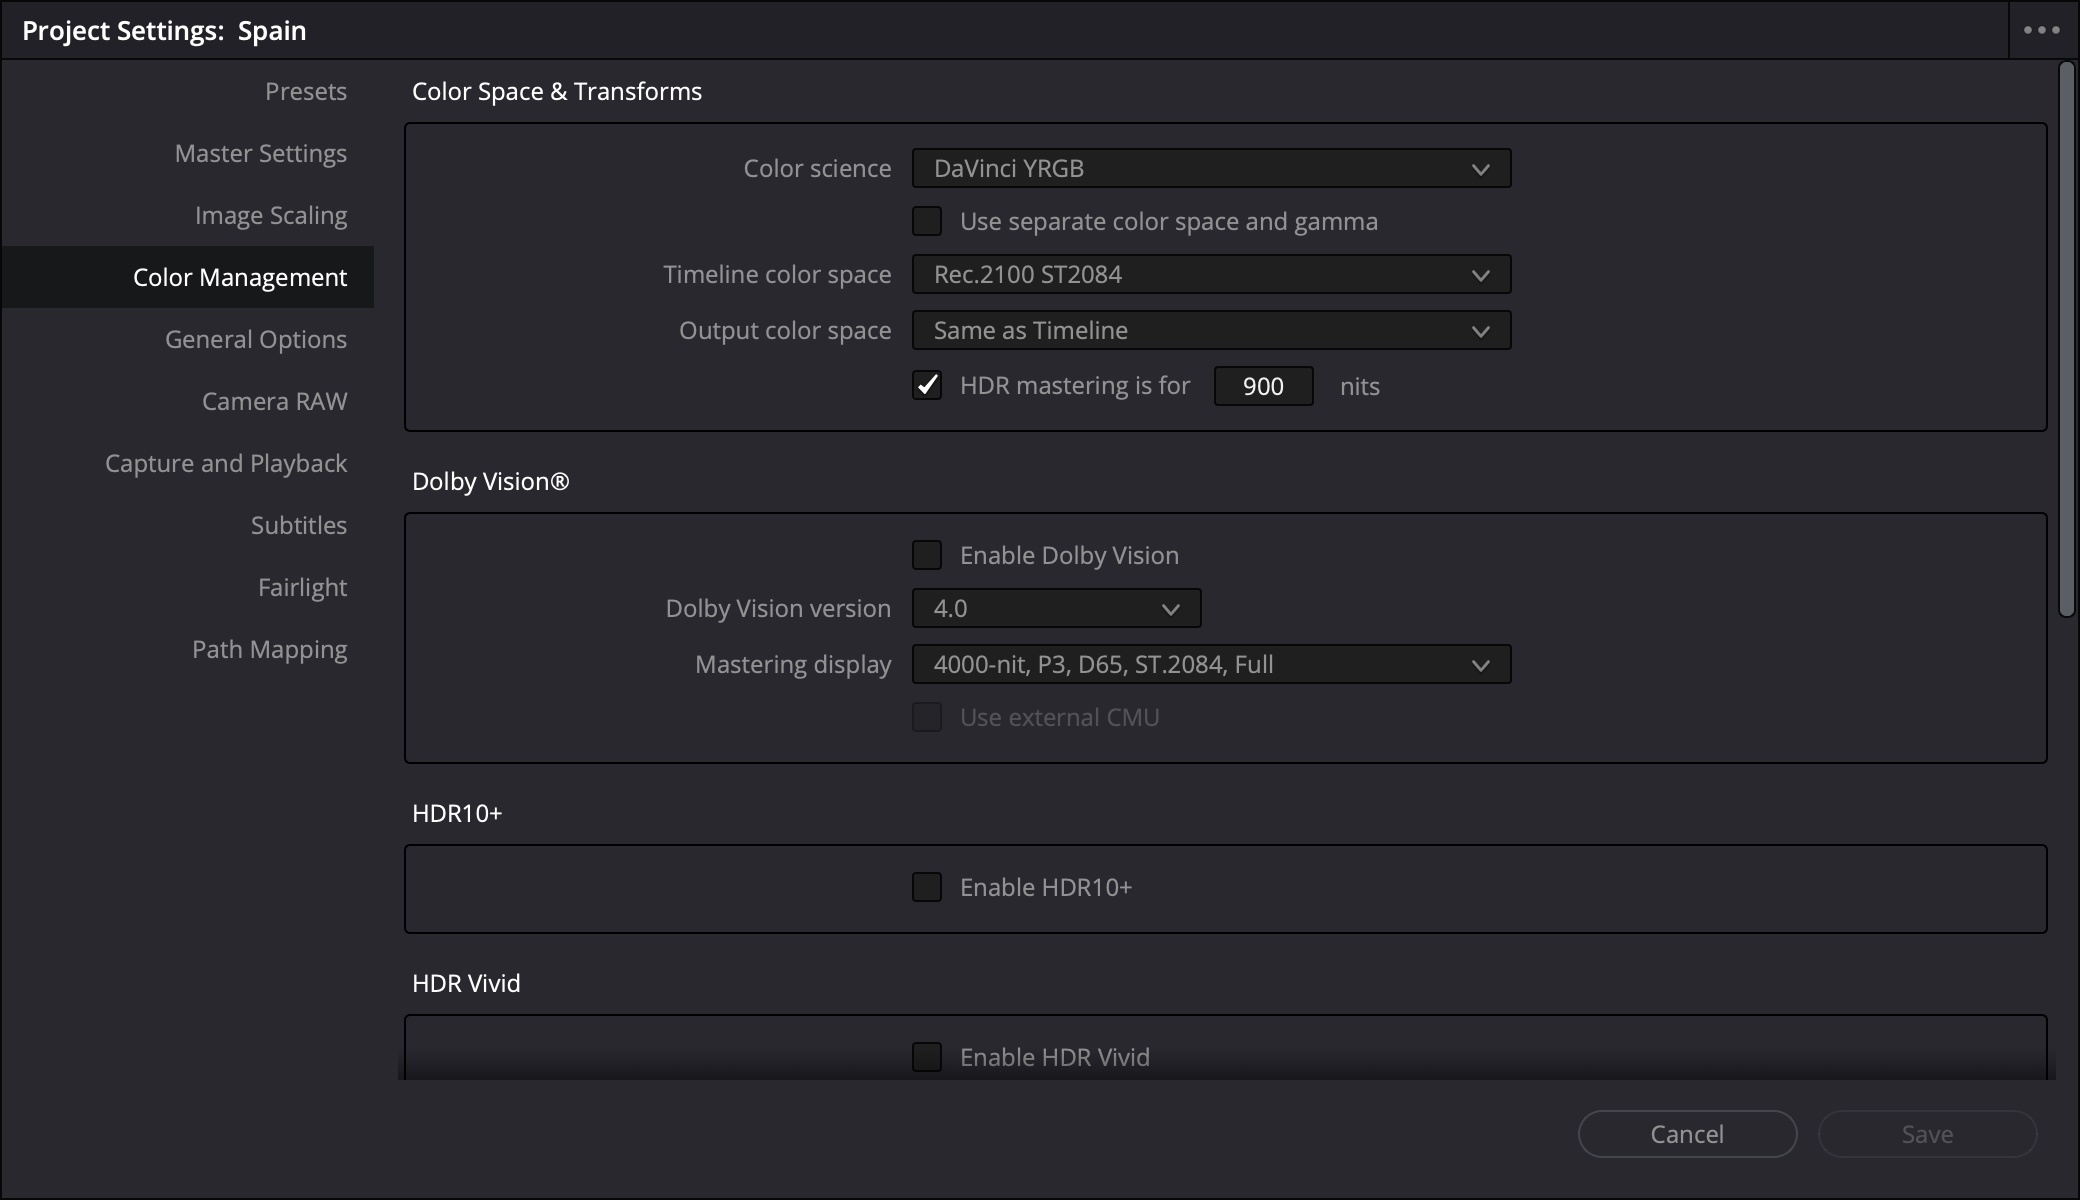
This example uses a BlackMagic Ultrastudio 4K Mini connected to an OLED TV to grade the HDR video. Therefore, the "HDR Mastering" setting is set at 900 nits to match the capabilities of the OLED TV.
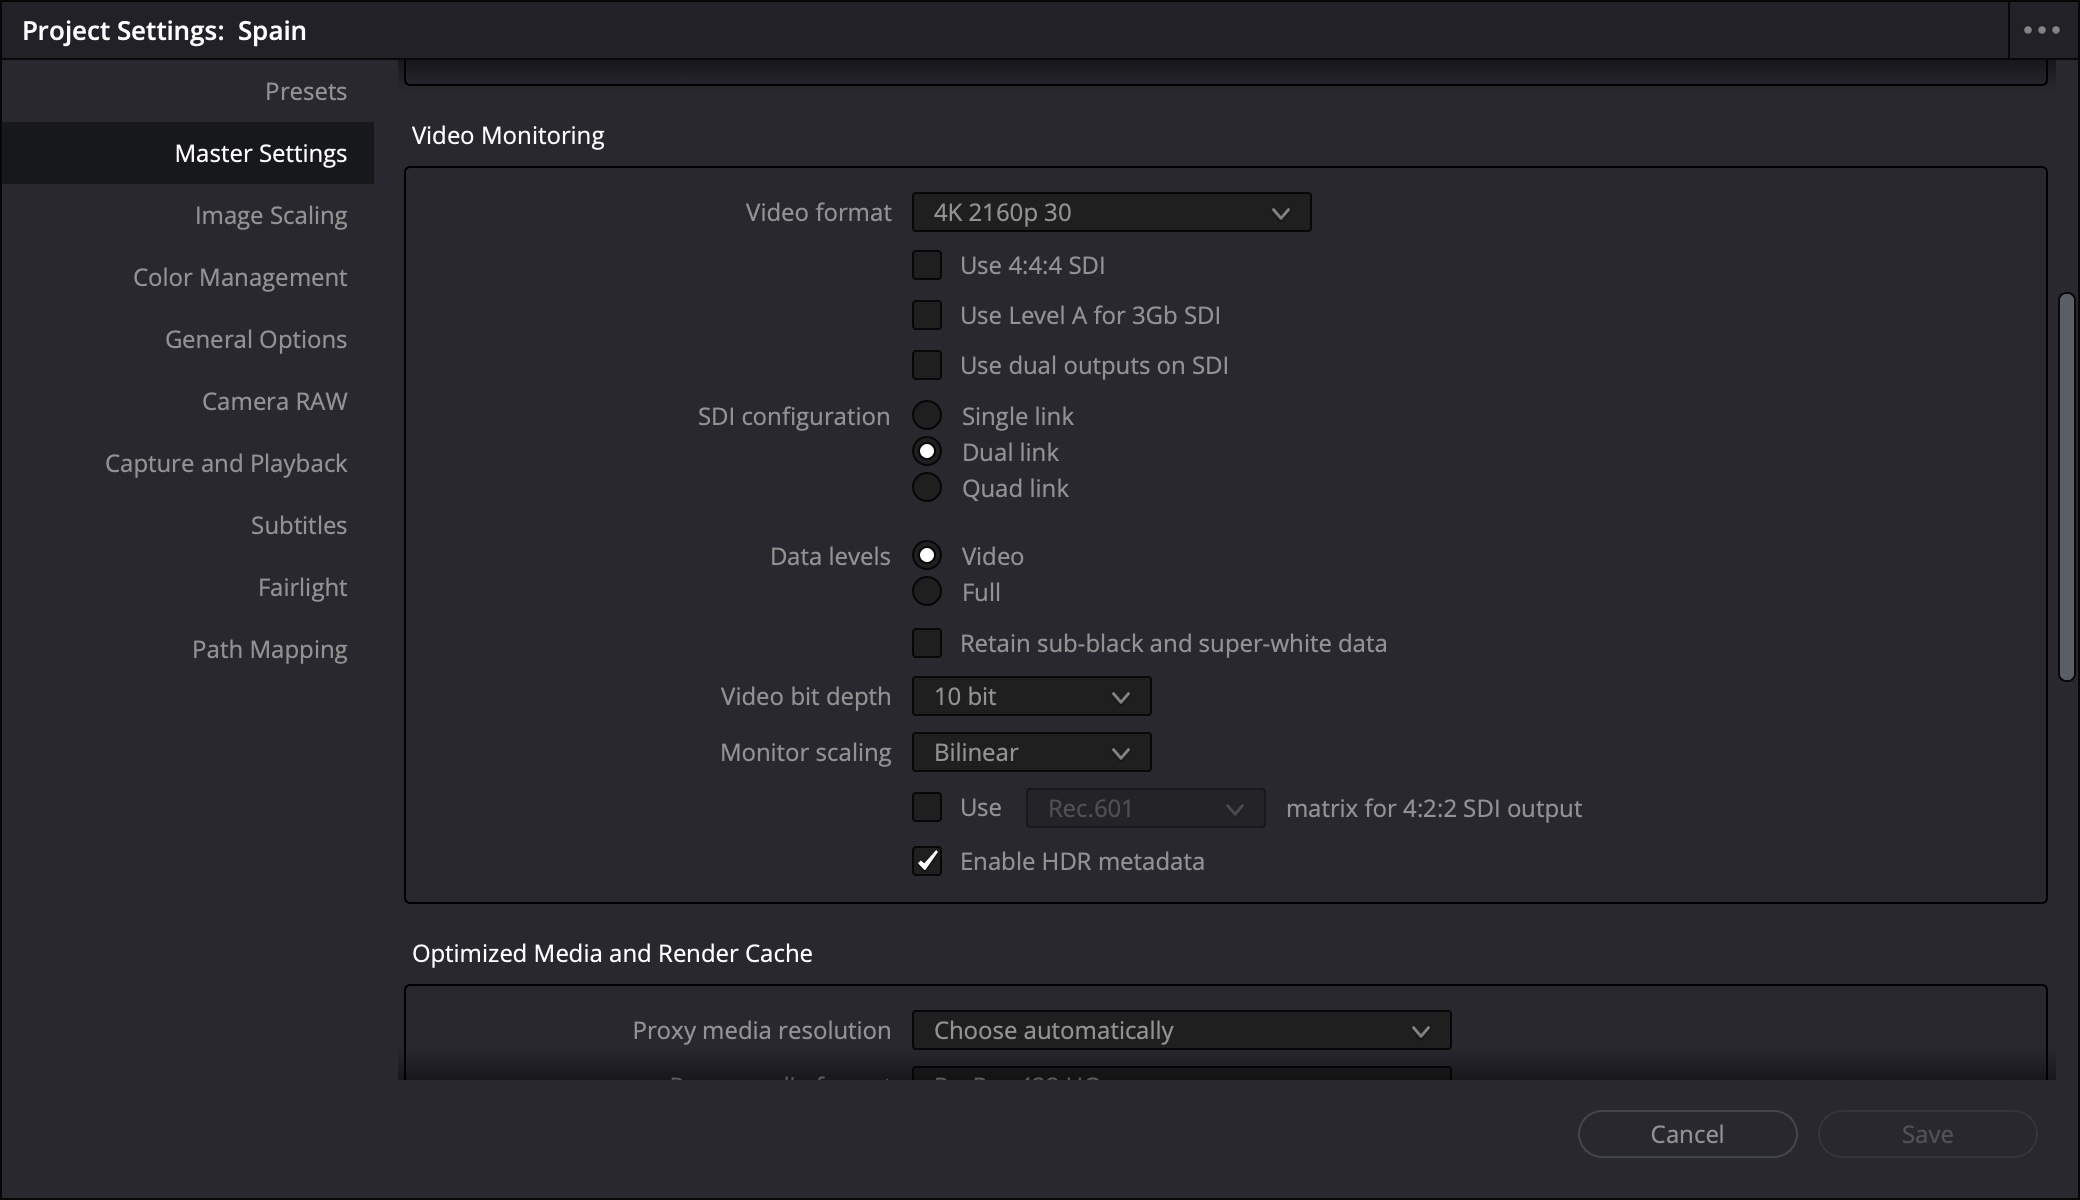
Ensure the setting "Enable HDR metadata" is ticked to ensure that HDMI Metadata is included with the HDMI output from the BlackMagic Ultrastudio 4K Mini. This ensures that the OLED TV displays the Rec.2020 PQ HDR video correctly.
2.2 HDR Color Grading using a LUT
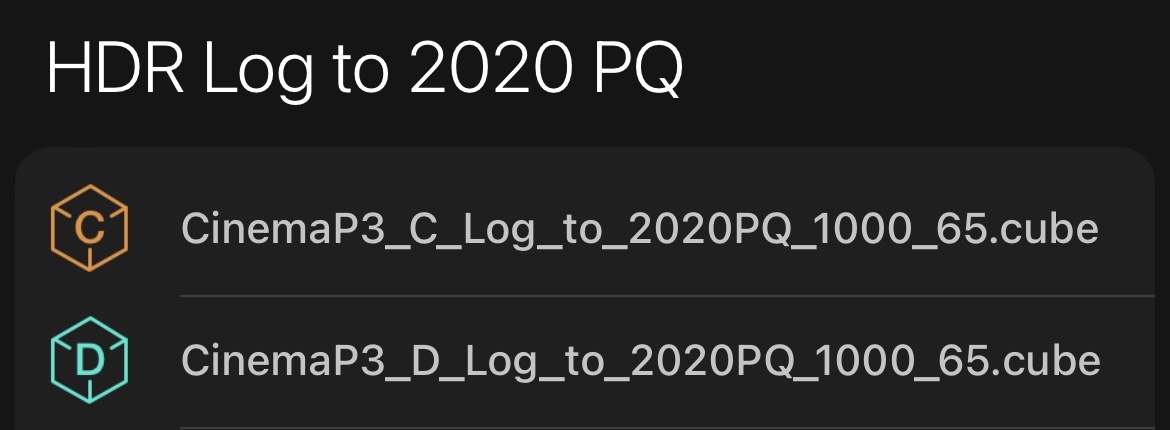
To convert C-Log and D-Log to the Rec.2020 PQ color space, the following LUTs should be exported from the Cinema P3 Pro Camera App and imported into DaVinci Resolve:
- CinemaP3_C_Log_to_2020PQ_1000_65.cube
- CinemaP3_D_Log_to_2020PQ_1000_65.cube
The "2020PQ_1000" part of the filename indicates that the LUT will convert video to the Rec.2020 PQ color space with a peak white point of 1000 nits. This is selected since it is the closest match the 900 nits peak brightness of the OLED display used for color grading.
A basic node tree is shown below. The first node (D-Log to 2020 PQ) uses the CinemaP3_D_Log_to_2020PQ_1000_65.cube LUT to convert video encoded with D-Log to the Rec.2020 PQ color space (Rec.2100 ST2084).
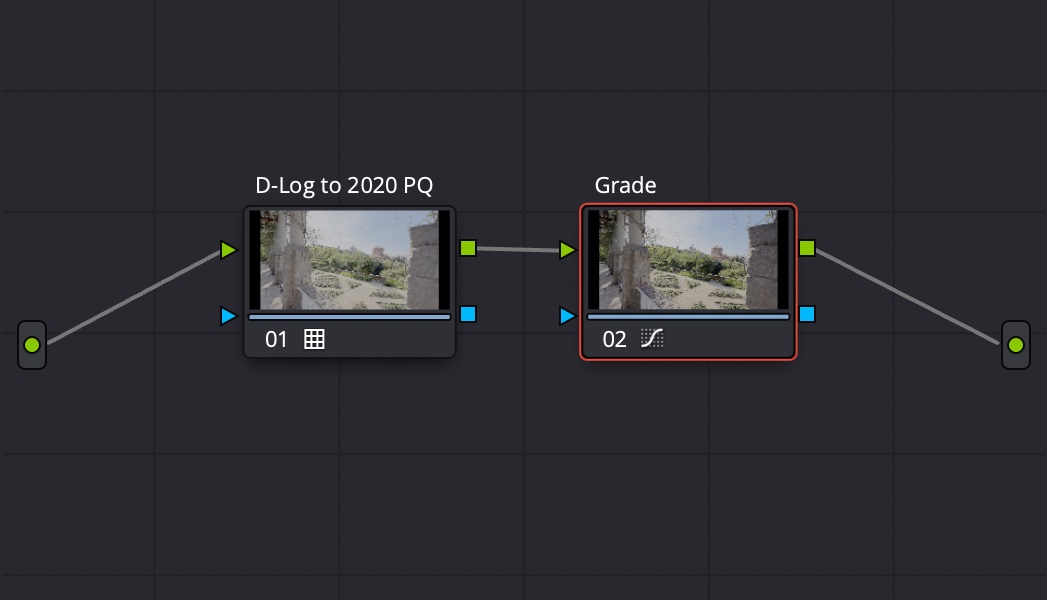
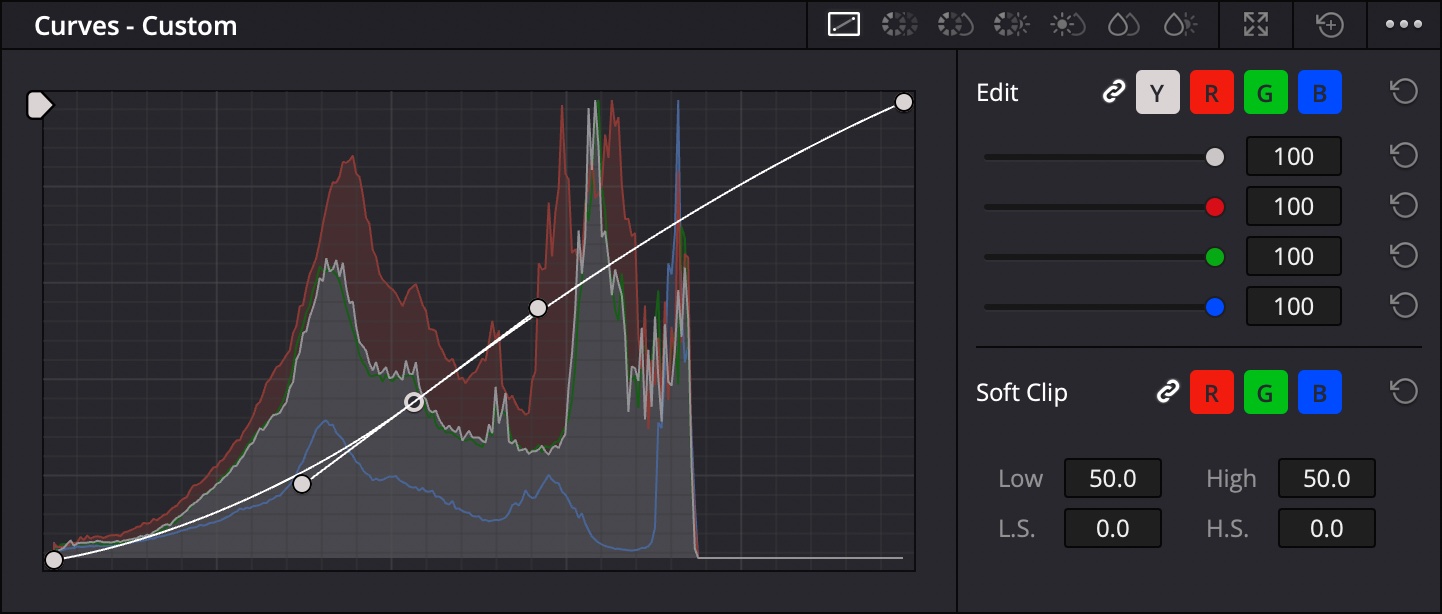
The second node (Grade) applies a color grade using an editable spline. Creating an S-Curve as shown can be used to create a cinematic look. The middle control point on the spline can be used to adjust the middle-grey point and to adjust contrast. The controls points at 0% and 100% can be used to adjust highlight and shadow roll-off.
Example 3 - DaVinci Wide Color Grading
3.1 Basic Node Tree
This example shows how to grade C-Log and D-Log video in the DaVinci Wide color space. This can be used for both SDR and HDR projects. Video is graded in the DaVinci Wide Gamut / DaVinci Intermediate color space and converted to the timeline color space using a Color Space Transform.
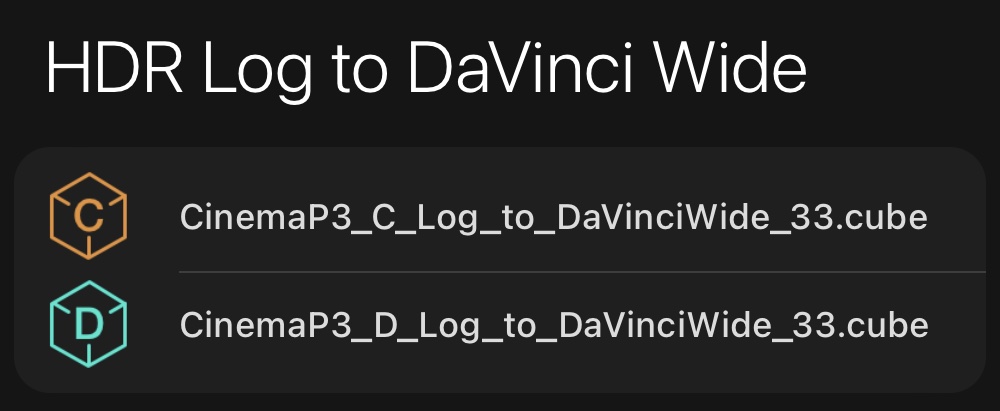
To convert C-Log and D-Log to the DaVinci Wide color space, the following LUTs should be exported from the Cinema P3 Pro Camera App and imported into DaVinci Resolve:
- CinemaP3_C_Log_to_DaVinciWide_65.cube
- CinemaP3_D_Log_to_DaVinciWide_65.cube
This example shows a basic node tree for color grading C-Log and D-Log using the DaVinci Wide LUT in DaVinci Resolve.
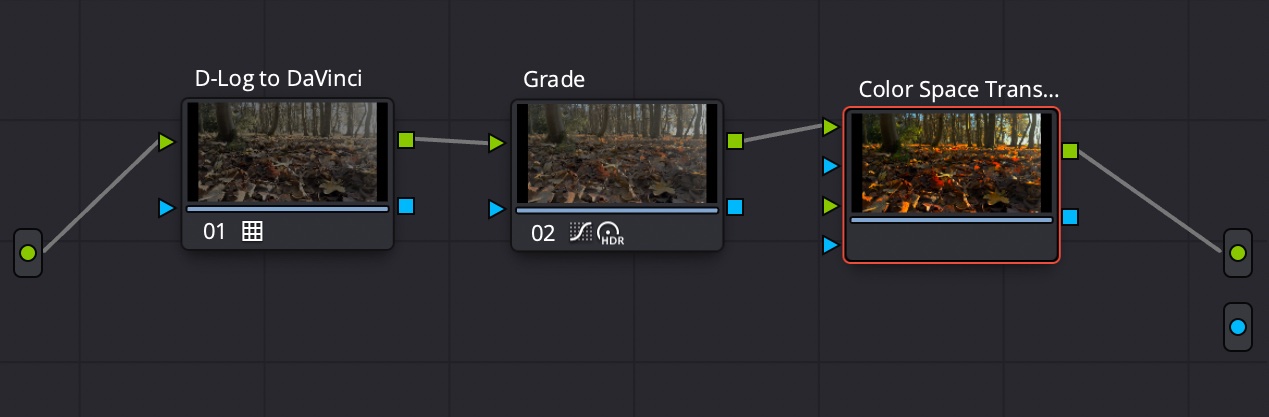
The first node (D-Log to DaVinci Wide) uses the CinemaP3_D_Log_to_DaVinciWide_65.cube LUT to convert video encoded with D-Log to the DaVinci Wide Gamut / DaVinci Intermediate color space.
The second node (Grade) applies a color grade using an editable spline. The middle control point on the spline can be used to adjust the middle-grey point and to adjust contrast. The controls points at 0% and 100% can be used to adjust highlight and shadow roll-off, and to set the black point and white point for the timeline color space.
The last node is a Color Space Transform to convert from DaVinciWide/Intermediate to the timeline color space.